

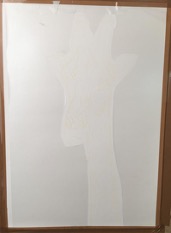
When using pastels on Pastelmat paper it’s practically impossible to keep the background clean – which is probably why we all put a bit of a background behind our main picture.
However what if you don’t want to do that, what if you want to create a large statement piece on white Pastelmat paper?
Getting pastel dust on the Pastelmat paper is unfortunately inevitable however you can do something about it!
Here are my Top Six Tips for cleaning Pastelmat Paper
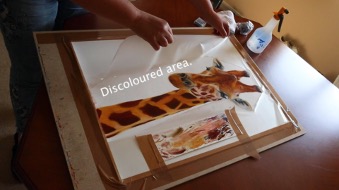
Tip 1 – Backing Plastic
The first tip is to cover as much of the paper that you’re not painting as possible.
I’ve used sticky back book covering – this is the self-adhesive plastic you use to cover kids’ schoolbooks, it’s easy to get hold of and not expensive, you may even have some leftover from covering those books!
Cover the whole paper and then cut around your initial drawing.
Be mindful with areas of the covering that go under areas you are painting as the pastel dust will drop onto the adhesive and create a dark mark that is tricky to remove.
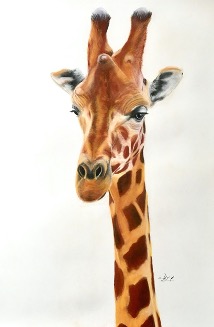
In this painting, I removed the element of the backing under the ears to reduce this once I discovered the issue.
Tip 2 – Keep Your Hands Clean
This seems obvious, but it is so easy to forget to be mindful of where your hand or the edge of your palm, lower arms, sleeves etc. are, especially if you do the majority of your pastel blending with your fingers.
One forgetful move and you’ve swept a mark over your background or leant on the surrounding Pastelmat and imprinted pastel on the background.
Tip 3 – Gently Blow Loose Pastel Dust From The Paper
Once you have removed the backing plastic gently blow the loose pastel off the background paper.
You can also use a light fan watercolour brush – be very gentle to ensure you don’t embed the pigment from the dust into the paper, you want to gently move it off the paper.
Tip 4 – Use A Putty Rubber (Eraser) 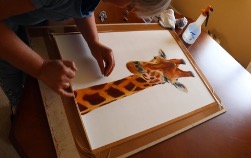
Use a Putty Eraser to remove as much of the remaining discolouration as possible.
This takes time.
Keep checking the surface of your putty rubber to ensure you don’t spread the pigment you’ve just picked up!
Tip 5 – Water! 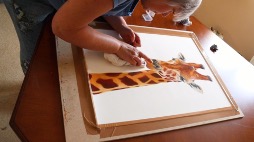
Pastels and water do not mix however Pastelmat paper is a mixed media paper and so can take water.
When you are cleaning pastelmat paper be mindful not to let the water touch your pastel!
Ensure your painting is taped to your board as the paper will buckle slightly but once it’s thoroughly dry (about 24 hours) this will straighten out.
Use a cloth the same colour as your paper to ensure it doesn’t transfer any fibres or pigment of its own.
Tip 6 – Cover Up
The final tip is to cover up any remaining small spots with either pastel or gouache the same colour as your paper – this should only be used for small areas and once that painting is behind glass they will be barely noticeable!
 Time for this painting to go and be scanned!
You can watch the video to accompany this blog on my Youtube channel and read lots more art hints and tips on my blog.
I hope this has been useful – let me know what else you’d like to learn and I will endeavour to answer your queries.
Happy Painting!!
Su x
If you love this gorgeous painting you can now buy a print or even a sticker!
Want to try your hand using PastelMat? Several of my Art Kits contain PastelMat including the incredibly popular Robin Art Kit
If you need to order some pastelmat or velour paper then you can’t go wrong with Jacksons. Place your first order by clicking the image below and receive 10% off your order. *new customers only
